

We all need some inspiration sometimes to style our hair, and style guides can help!
In this blog, we will cover 5 of the most iconic hairstyles and how to achieve them step by step. First things first, it all starts with the right haircut. Then consider other factors such as your hair type, hair weight, hair density, and face shape (we can help with this - try our free quiz). You have to remember; if you have a poor base to start with, you will not be able to achieve the hairstyle of your dreams. Experimenting with new hairstyles and seeing what works best for you is equally important. You can achieve your desired look with a little bit of creativity and the right hair product!
Here is a list of 5 popular hairstyles and how to achieve them:
1. Pompadour
The pompadour is a classic hairstyle that exudes sophistication and style. It mostly suits straight hair, but wavy-haired folks can also give it a shot!
What to Tell Your Stylist:
Before setting out to style your hair, you must have the proper cut for a pompadour. Tell your barber to leave at least 6-8 inches of hair at the top; the sides can be as short or long as you desire (the shorter the sides, the fresher your pompadour will look). Ideally, the sides should be done by scissors to induce a character to your hairstyle, but only go for this option if you are 100% confident in your “bond with your stylist.” A relatively safer option is a trimmer on the sides, and it will give you a neat and edgy look.

How to Style it:
- Start with clean, towel-dried hair.
- Use a blow dryer to give your hair some volume.
- Now, take a pea-sized amount of product with low to medium shine and firm to high hold and rub it between your palms to warm it up and emulsify properly.
- Then, apply the clay or wax evenly through your hair, focusing on the roots.
(We recommend using Rager or Pomade for this hairstyle, depending on your hair type. If your hair falls flat, use Rager due to its robust and vertical hold properties though it will add a little grit to your hair, or you can use Pomade, which gives your hair a beautiful balance of shine and hold.)
- Use a comb to lift the hair at the front and push it backwards, creating volume and height.
- Shape the hair with your fingers to achieve the desired pompadour shape.
- Finally, use a hairdryer on low heat to set the style in place.


Some references:

2. Messy Textured Crop
The messy textured crop is a trendy and effortless hairstyle that works well for short to medium-length hair.
What to Tell Your Stylist:
One important thing to consider for this hairstyle is your hair’s natural thickness and texture. It would suit the best to the guys who have relatively thick hair. There aren’t any particular hair length guidelines for this one, except the obvious: don’t cut them too short. One way to cut a messy look is to tell your barber to jue scissors and keep your hair at least 4 inches long at the top to maintain your hair’s natural texture. If you want to pair it with a fade instead, ask your barber to trim the sides and back with a trimmer and keep the top long and spiky. Always keep your face shape in mind when going for a fade, and consult your barber about what look would look best on you.

How to Style it:
- To style, begin by applying 4-5 sprays of Texturising Spray throughout your hair and spreading it evenly using your fingers. And let it naturally dry.
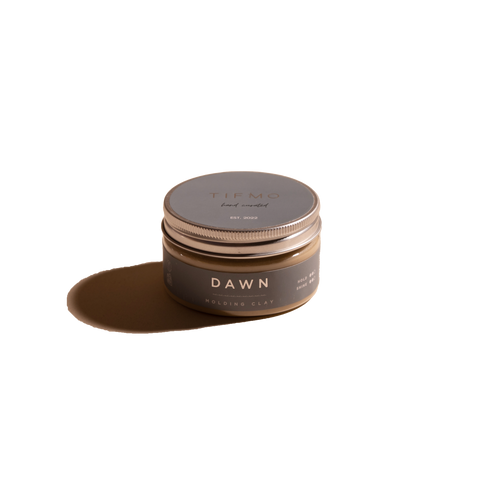
- Then apply a small amount of your desired hair clay to your fingertips. We recommend Dawn for this, especially if you have curly hair; otherwise, a safer option is Rager, as it has Bentonite clay, which makes your hair appear thicker and compliments the texture you got from the Texturising Spray. But be careful, you don’t want to use too much.
- Work the clay through dry hair, starting from the roots and moving towards the ends. Use your fingers to tousle and scrunch the hair, creating a messy, textured look.
- If you want more volume, use a blow dryer on low heat while scrunching the hair with your hands.
Some references:

3. Slicked Back Undercut
The slicked-back undercut is a stylish and versatile hairstyle that suits various hair lengths.
What to Tell Your Stylist:
First, ensure you have ear-length hair (at least). This style works best with long hair, giving you that smart slicked-back look. The sides and back can have a high fade with a trimmer or a scissor cut with a skilled hand. For the top, keep in mind not to go below 6 inches.
For a bolder look, you can go for a skin fade around the sides and back.

How to Style it:
- To style, start with damp hair for better control.
- Take a small amount of hair clay and distribute it evenly through your palms.
We recommend Pomade for this hairstyle due to its firm hold and medium to a high shine, giving a wet, slicked-back look.
- Apply the product to your hair, starting from the roots and working towards the ends.
- Use a comb to slick back the hair, pushing it away from the face. Ensure the sides and back look neat and there are no flyaways.
- Polish your look by using a brush to smooth out stray hair, and finish with a light mist of hardening hairspray to hold the style in place.
Some references:

4. Beachy Waves
Beachy waves give a relaxed and tousled look that is perfect for a casual, carefree style. This hairstyle requires long hair, ideally 10-12 inches of hair.
What to Tell Your Stylist:
This style requires long hair (at least down to your ear). Get your barber to shape your hair according to your face shape by cutting your fringe hairs (above your forehead) slightly shorter to bring out your face and have it curtained by the hair on your sides like this:
You can experiment with this haircut by having your sides cut slightly short with a scissor to give a layered effect. We highly recommend not to use a trimmer for this haircut.

How to Style it:
- To style, after washing your hair, allow it to air dry until it is slightly damp.
- Start off by applying 4-5 drops of Hair Firming Serum, rubbing into the roots and through your hair.
- Rub a small amount of Dawn molding clay between your palms to warm it up. Less is more.
- Apply the clay to the mid-lengths and ends of your hair, avoiding the roots.
- Then, twist small sections of hair around your fingers to create loose waves.
- Allow your hair to air dry completely.
- Finish by applying sea salt or texturising spray and tousling the waves with your fingers to achieve a beachy, textured look.


Some references:

5. Quiff
The quiff is a versatile hairstyle that adds volume and height to the front of your hair while keeping the sides and back neatly styled.
What to Tell Your Stylist:
Before styling, ensure your hair is ideal for a quiff. Tell your barber to shorten the hair on your sides and back using scissors for a tapered finish. Or you can fade the sides into the longer hair on top for an even look while keeping at least 3 inches of hair at the top. If you are feeling bold, you can also experiment with skin fade! Consult your barber about whether the fade would suit your face shape.

How to Style it:
- To style, begin by blow-drying your hair (but not completely dry). Remember to keep slight moisture in your hair for better control.
- Then, apply a small amount of hair clay to your palms and work it through slightly damp hair.
(We recommend Rager for this hairstyle due to its stronghold demands. Or you can use Pomade to add that little bit of shine.)
- Use a comb to lift and push the hair at the front upward, creating volume and your desired shape. Then blow-dry them in that direction to lock them in.
- Use your fingers to shape and mould the quiff to your liking.
- Finish with a light mist of hairspray to hold the style in place throughout the day.
Remember, the amount of hair clay or wax needed may vary depending on your hair length and thickness. It's always better to start with a small amount and gradually add more as needed. Additionally, feel free to experiment with these styles and customise them according to your preferences and desired look.
Some references:

Conclusion
Let us know your next hairstyle you are going and what else you want to see in the comments below.
Until next time!
